|
|
Post by poofiemus on Sept 3, 2012 22:46:49 GMT -5
UPDATE FEBRUARY 8 2014! New photos on THIS POST for armature progress and THIS OTHER POST for eye and claw progress. I figured I ought to start a thread so you guys can keep me from lapsing into creator ADD and keep me on task.  So, like many others here, I have in the past made a plush Night Fury using KatyA's pattern from Deviant Art, and named the result Pancake. Now, don't get me wrong, I love Pancake to death (hugging him right now even), but while KatyA's pattern is great, it's definitely proportioned on the cutsey, potentially baby end of Night Fury. My goal here is to make a *badass* Night Fury instead, to properly be Toothless. My current plan is to put an armature inside him so I can pose him, for photostories with my dolls and to wrap him around me for conventions. My original plan was to commission someone to make his eyes out of resin or glass, but now I'm going to be brave and make them myself, out of a combination of polymer clay and clear resin. Task ListRed is to-do, yellow is in progress, green is complete. -Alter Pattern: (sometime in like, May)-Transfer Pattern: Sept 2 2012
-Cut pieces: Sept 2 2012-Eyes: Irises
-Eyes: Resin Lens-Sew all pieces May 5 2013-Order doll armature May 15 2013 -Get and cut plastic for limbs
-Shape Cuts with Coping Saw Remaining: 10 pieces
-Beveling with Dremel Remaining: 19 pieces
-Make claws out of Kato clay (Sculpt complete, Dremeling and mounting to eye bases remaining)-Assemble all armature
-Stuff him
-CELEBRATESo, ages ago I got some awesome upholstery fabric from my fabric store, this kind of velveteen embossed in a sort of scale pattern. I think it was supposed to emulate suede, but the appearance is definitely more dragon-y to me, while still being soft. Perfect, so I snagged two yards, though in two trips so the two pieces don't entirely match.  The softer stuff on the left I'm using for the body, head, and front feet; the coarser stuff on the right is for the wings, back feet, butt fins, and the tail fin. Closeup of the texture:  After the purchase I made a teeny little mockup of my modified pattern out of paper towels. Edit: the maternal unit sent photos of said mockup, so now you can get some idea of the modified proportions: 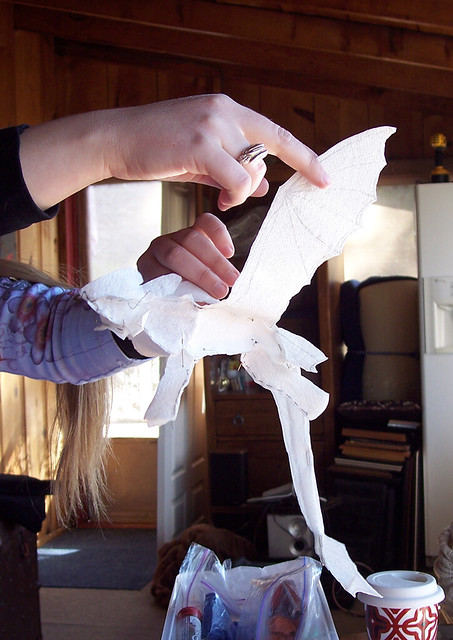 To maximize the fabric, I scanned the mini pattern into Illustrator, traced the pieces, and made two rectangles to scale with my two pieces of fabric. I laid out all my pieces there, then printed the mini version, and used a projector to copy it to the fabric via fabric marker. 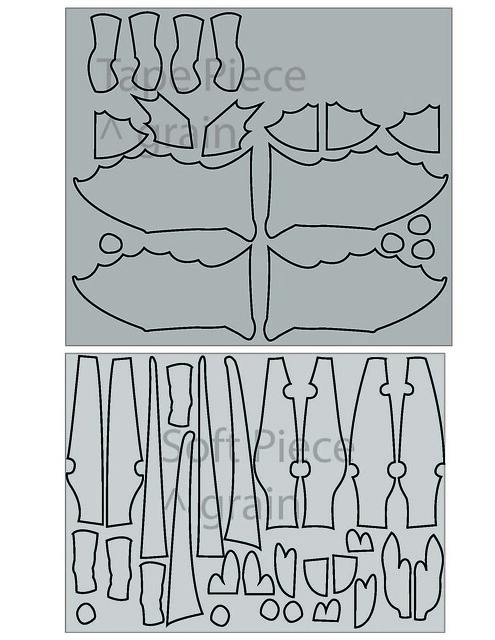 (Projector step skipped because it doesn't photograph worth beans) So, I finally cut out all the pieces, and laid them out on my bed to get a sense of how big this sucker is going to be. Short answer: BIG. 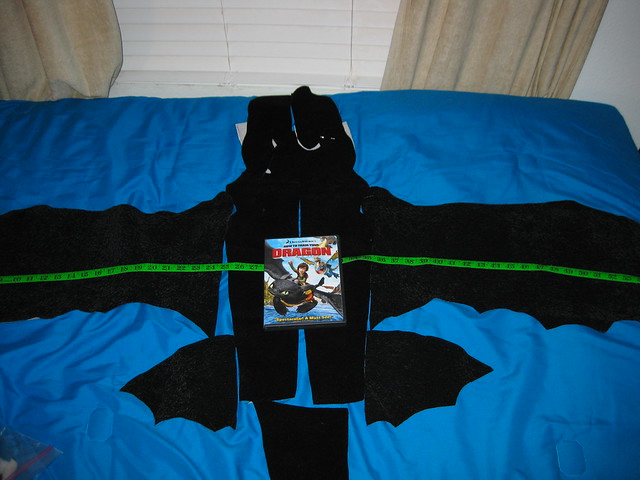 DVD included for scale. The measurement is going to shrink somewhat due to seam allowance, but right now the wingspan is around 58 inches. Pancake is not happy that he's no longer going to be the biggest dragon in the house: 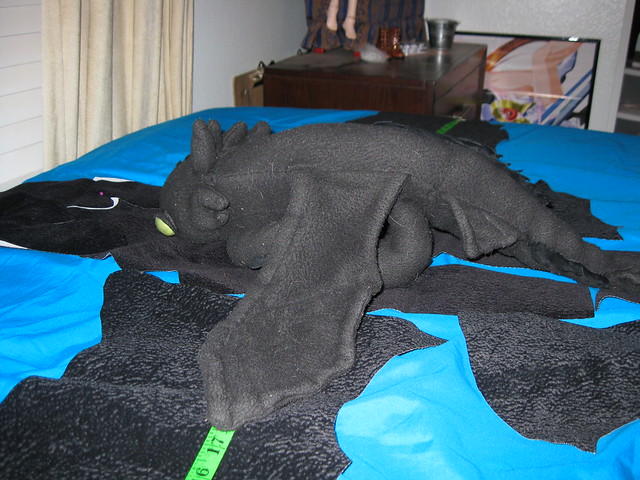 Pancake: *grumble grumble SEETHE* Now I've got to wait for the sewing machine to get back from the shop--last guy I took it to evidently *glued* a cracked part together instead of replacing it, sigh. DEC 24: I've made some progress on sewing the pieces together, having borrowed my grandmother's machine. 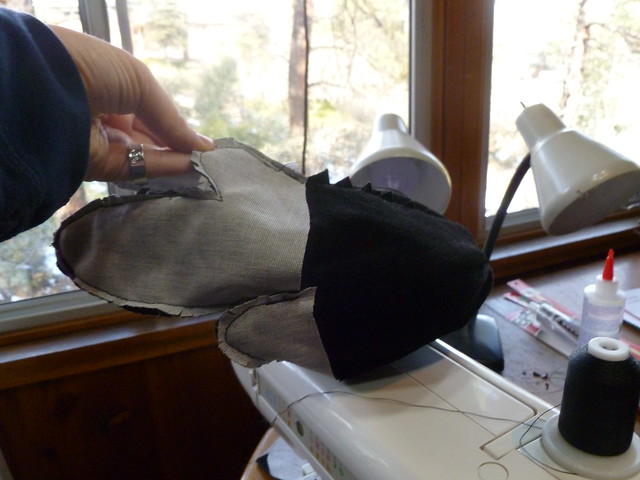 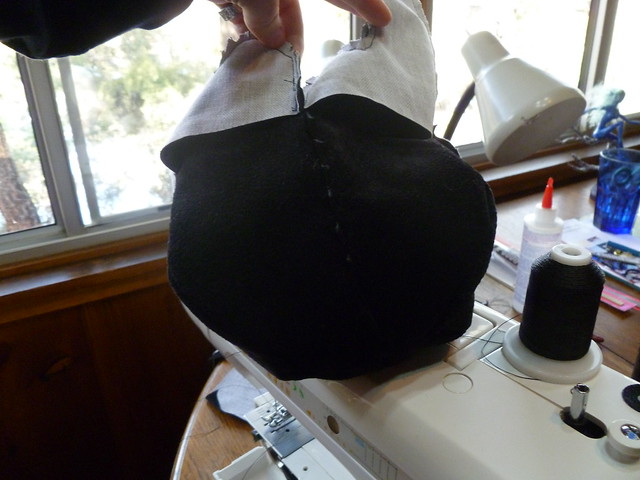 Head is completely assembled with all seams snipped periodically on the inside, so things will sit nicer when turned. I haven't turned the ears/fronds right-side out yet, since I'm still constructing and they're narrow enough to be a bit of a pain to turn. Interesting side note: While the machine can't sew through leather under power, it *will* go through if I use the hand crank instead. Even though it's not as fast as if I were using the motor, it's still WAY faster than the way I had to do it on Pancake. (pardon the blurry pic) 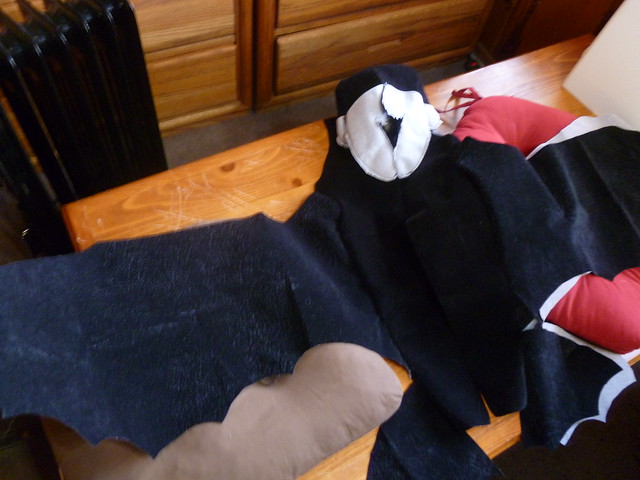 Now I'm attaching the wings and the butt fins. The upper halves of the wings and fins have been attached to the back, and one of the sides has the lower halves attached. The other side is in progress. 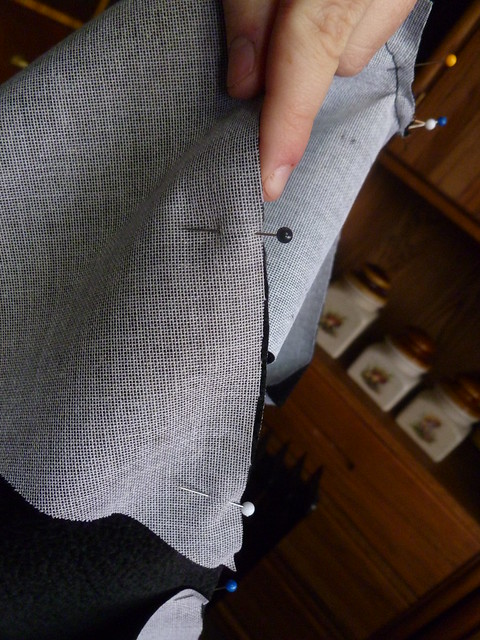 Since I know some of you are curious about sewing, I figured I'd show a picture of how I pin stuff together prior to making a seam. Right sides together, with pins perpendicular to the seam whenever I can manage it. I'm off work for the next few days, so hopefully I'll be able to crank out a fair chunk on him before I have to go back to my art monkey work.  |
|
|
|
Post by toothless11 on Sept 6, 2012 18:26:24 GMT -5
Oh wow this is turning out REALLY good! Good luck on making it! It's HUGE!! XD I look forward to seeing the progress you make And Pancake is Jelly Lol I really wish I could make one myself...It would be awesome But then my mom and sis would think that I'm weird...especially since they didn't like HTTYD that much -__-. If It weren't for them, fact that I don't have money and the fact that I know nothing about sewing, I would definitely make one. Though if I even tried...It would turn out terrible I really wis I could... |
|
|
|
Post by poofiemus on Sept 6, 2012 20:42:19 GMT -5
Thank you, T11! It's nice to finally be getting this project going after having the fabric for literally months. ^^; Can't wait for the sewing machine to get back from the shop so I can start putting him together. I think with some patience and practice you could pull a plush night fury off! Maybe starting with this giant size isn't practical, but that still leaves a Pancake-sibling a possibility. (BTW, while he is Katy-A's pattern I had it enlarged to 11 x 17 paper, which comes out *perfect* snuggling size and makes turning the legs right-side-out at the end easier than leaving it at letter.) I'll admit I've been procrastinating on this project for a while due to being intimidated by it, lol; however in my case that's mostly due to the whole armature thing, since I've never put anything poseable into a plush before and my Dollfie Dream girls' posing has kind of spoiled me. ^^; I do remember being intimidated by sewing in the past too, before I got into it via making clothes for my dolls, but once I actually tried it it turns out it's not too bad. Tutorial videos help a ton, especially if you're hand-sewing. Practicing on scraps, rags, or paper towels first is probably a good idea, but once you get the hang of it you'll find sewing is kind of a repetitive, zen art. I'll admit that while my mom is also a fan and totally got it right away, when I made Pancake my dad and grandmother first heard what I was doing and thought it was pretty silly.(The fact that I sometimes carry him on my head probably didn't help, but honestly, the Katy-A pattern furies make great hats.) They got over it though, to the point where my grandmother keeps threatening to kidnap Pancake. XD So that may not be as big a hurdle as you fear. The no money for mats thing is probably going to take the most patience, actually. You actually can get decent fabrics for good prices, it just takes hunting and waiting for sales. Joanne's and Hobby Lobby usually rotate their sales through different fabric types, and send out coupons, so it can be worth it it to get on their email lists for sale announcements and the coupons. If you make one Pancake's size you'll only need one yard of whatever, as opposed to the two Mondo Toothless takes. If you hand-sew instead of using a machine, tug on the fabrics in a couple directions to make sure it doesn't stretch, as that'll cause your fabric to warp a bit while you sew it. (If you get access to a machine, then it doesn't matter.) You can do it! Go, sew, WIN! =P </attempts at getting a sewing cohort> |
|
|
|
Post by toothless11 on Sept 6, 2012 23:21:23 GMT -5
You're welcome! ^^ Good luck! Yeah I certainly wouldn't start with a plush that big... Where'd you get that pattern from? Lol...Well I Might try and practice sometime with basic stuff while I'm alone at home after arriving from school... Thanks for the tips ^^ Well...I don't think it would be the same with my mom and sis. My sis usually makes fun of interests I like...and my mom doesn't seem interested in it either. Like I started making digital art this summer, and neither of them sounded like they really liked it when I showed a pic that I made to them... Same with raising money to get the stuff that I need. I currently have more than enough saved, but I want to buy something and my mom keeps o discouraging me to do so by saying that what I want isn't worth it...I currently want to save to buy a graphic tablet for drawing. But I still might be able to buy the fabric. But the problem is, We've Lived in Mexico for a few years already (I don't like it here much ). So there's not that many fabric stores here...during summer, we went to one and I was looking throug the stuff, and I think I did find the type of fabric that I found in a tutorial to make the plush, but it's quite expensive...Can't remember how much though. I did tell my sister that I wanted to make a plush, but looked like she thought I was weird  Well...seems like I wouldn't need mch then XD And no sewin machine...so it's gonna take a LONG time for me to work on it if I do plan on making one...XD But thanks! I really do want to make one soon...Maybe the progress you post here can help in some way XD |
|
|
|
Post by poofiemus on Sept 7, 2012 21:25:19 GMT -5
Thanks, Seb! Yeah, sewing is one of my hobbies, though I've only been doing it for a couple years as opposed to my other hobbies like sculpting, which I've been doing for eons. I had been wanting to sew for forever, but didn't actually pick it up until I got my first BJD. They're my guinea pigs since I can make entire outfits for them out of stuff from the scraps bin and thrift store clothes. XD Since I started with BJDs a lot of the tutorials I learned from I picked up from the forum denofangels.com, but I learned a bunch just from looking up other tutorials on YouTube. I also learned a lot from trial-and-error, so mock-ups have become my best friend--paper towel mockups for the dolls, and I'll be using old sheets when I start putting together the steampunk costume for myself I'm plotting. I then actually use my mock-ups as my pattern, since I know it fits. This is the pattern/tutorial I used for Pancake, and used as a basis for the Mondo Fury: katy-a.deviantart.com/art/How-to-Plush-your-Dragon-161986356 The laid-out pattern on the grey background I posted earlier in my first post is the edited version I'm using for the mondo fury, though I will say it's not perfect by any means; I've got some excess fabric around the backs of the ears for instance I'll have to trim away. But meh, that's just sort of how it goes sometimes--you try something, and have to tweak it to make it work. At least with sewing the only part you can permanently screw up is cutting out the pattern, and anything else that's wrong you can usually bust out the seam ripper and try again, unless your fabric is really super-fragile. Quite a nice change from sculpture, where if something is truly wrong there's not much you can do after it's cured, and a late stage screw-up can kill the entire sculpture. >.< (I still love it, though it's far less relaxing than sewing.) T11, I've actually learned a lot from worklogs for other people's projects, whether it's sewing, sculpting, doll/figure modding, or digital painting/modeling, so I actually posted this partially in case it might maybe do the same for someone else. It was actually someone's worklog on giving a doll a furry, poseable tail that gave me the idea of how to give this plush an armature, incidentally. I hope that I can help you by sharing how I screw stuff up so you don't do the same! XD |
|
|
|
Post by toothless11 on Sept 8, 2012 12:34:14 GMT -5
Lol that's intereting XD And thanks for posting the pattern ^^ Lol thanks for posting this XD Hopefully it will help me I wish there was a video tutorial though...Since sometimes I don't quite understand tutorials with pictures only that much Man, but I really do want to try making a plush...though of course, lots of stuff prevent me from doing so  I mean, even if I do decide to make it, no caring what everyone says and all, the store that we went to is pretty far away...And I don't think my mom would want to take me to a far away store, JUST to buy fleece (or whatever the thing's called) and make a plush. She's probably do anything to change my mind |
|
|
|
Post by poofiemus on Dec 24, 2012 16:42:21 GMT -5
Finally got some progress done on this guy! New pictures and info in the first post. |
|
|
|
Post by poofiemus on May 6, 2013 0:50:51 GMT -5
Right, I've made a LOT of progress since my last update, but it can be summed up as such: Principal sewing is DONE! Yup. Done. I did take a lot of progress shots, but didn't post them because. . . reasons? Okay, I have no good excuse really, but here's some of the shots I took as I made my progress up through approximately this afternoon. I did eventually get the main sewing done, and got him turned right-side out. 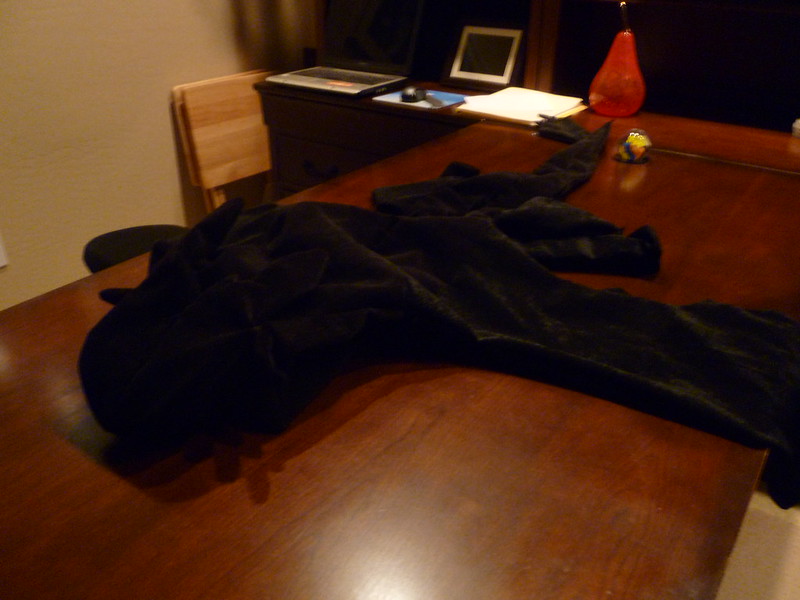 I was about to move forward, but on a whim I stuffed some towels into him to get a sense of what he'd look like properly stuffed. The answer is: Fat! Didn't get any shots of him in that stage, but I promptly turned him back inside-out and started making edits. I took in the neck seam that goes into the wings, a bit on his sides between his front and back legs, and a TON on his underbelly, lower neck, and tail. You can see just how much I took in when you look at these shots I took when I decided the changes were sufficient: 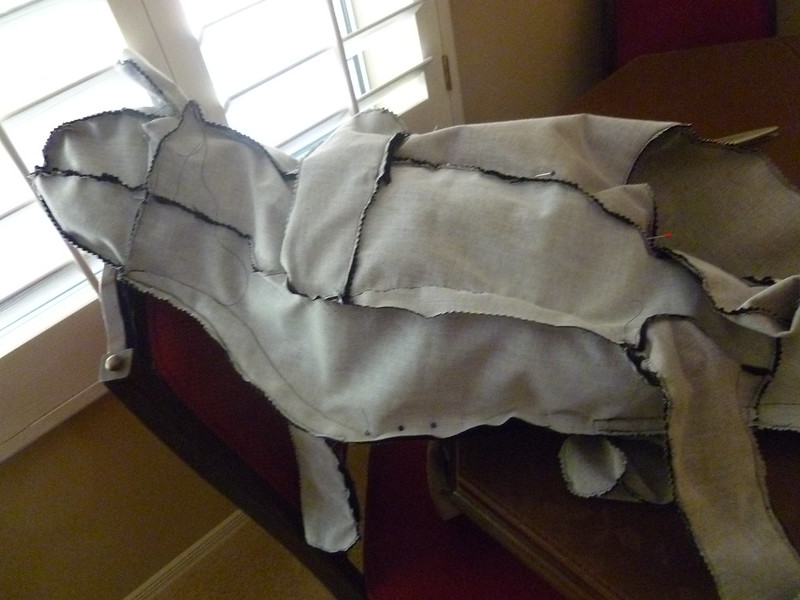 The changes to the underbelly are easily an inch and a half inward. After this I trimmed the excess off, with pinking shears so I effectively snipped the seams for a better lie while I was at it. Now that he'd been through his extreme weight loss program, I could finally detail the wings and fins! And that definitely needed to be done. 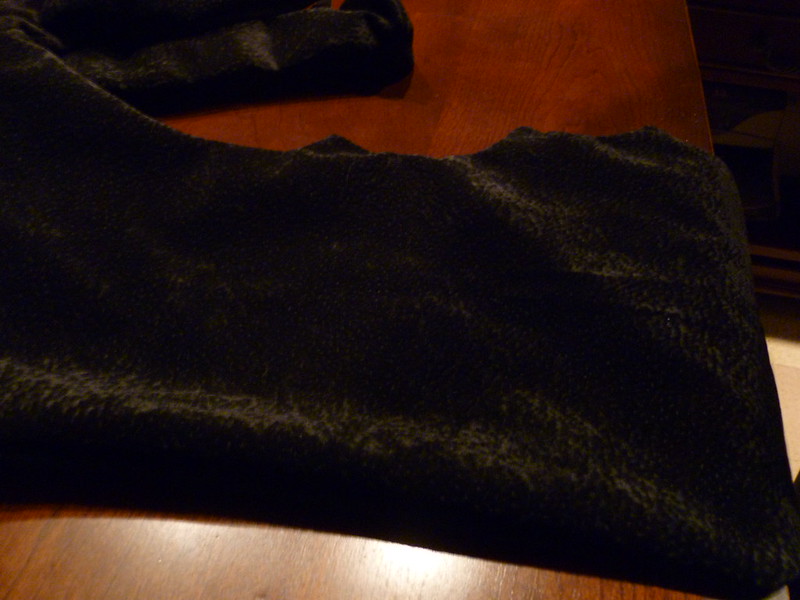 Unfinished wing. You can see it's a bit boring and flat. On Pancake, I just did simple top-stitching along each of the wing and fin bones. However, when doing some research for the Mondo Fury, I found someone on DA who had used this next trick on their night fury and wanted to try it. (I really REALLY wish I could remember who, as I'd like to thank them. Turned out gorgeous!) 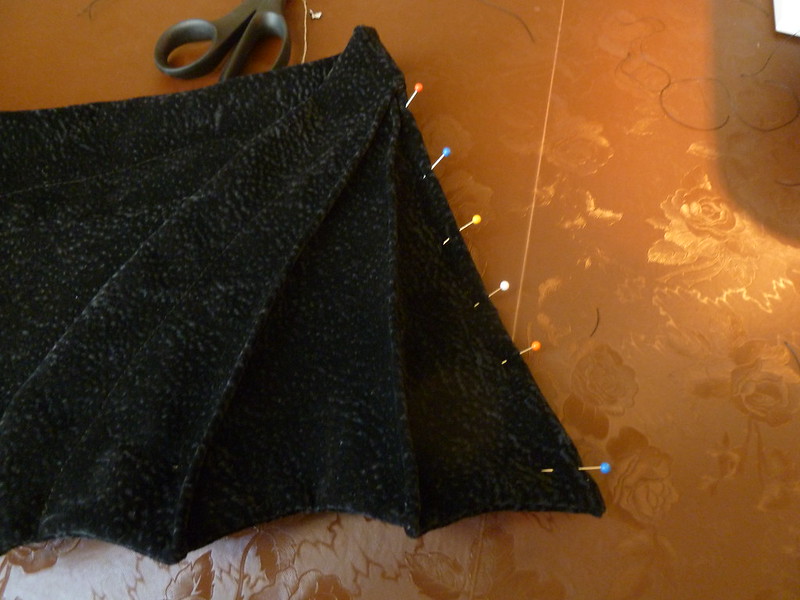 Basically, each wing/fin gets folded over itself along where the ridge is going to go, and then sewn over the fold. Emulates bone or cartilage without having to put an armature in every single strut--only armature is going to be in the leading edge of the wing, which I sewed a channel for. Bit more detail of the ridges, so you can see how they go when there's not pins all over them. Underside of the wing: 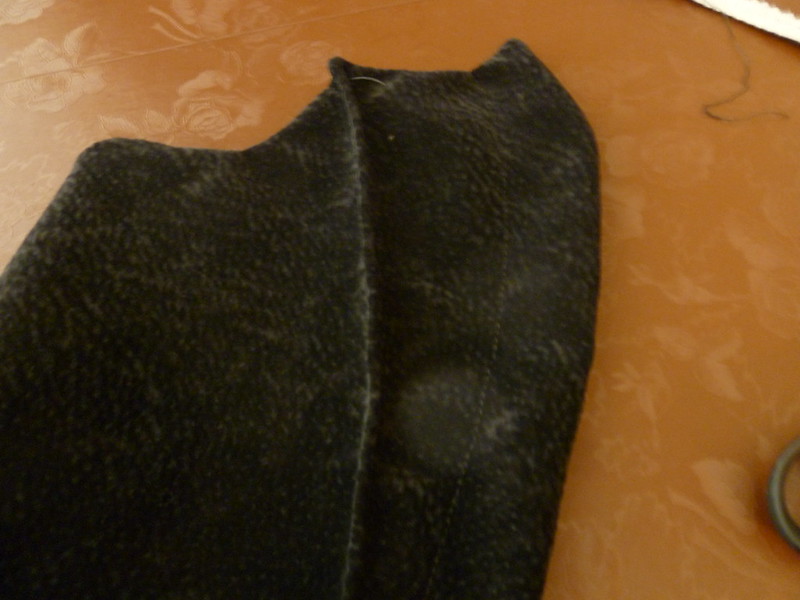 Upper side of the wing: 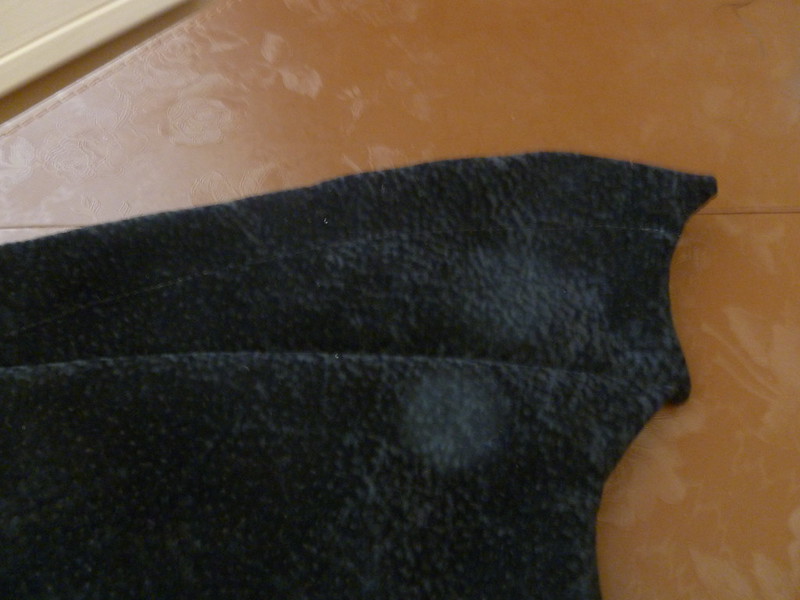 Much better than the flat wing, and even better is that when you bend the wing along the leading edge, the rest of the wing naturally bunches along the ridges. So, that bit's done--no full shots of the wings, butt fins, or tail fin currently, but they are fully ridged now. I also measured him: Spine: 53" Leg span: 27" (same for both front legs and back legs) Wing span: 50" (Following along bends, where armature will be: 60") From tip of one ear, downward to base, across head, and up to tip of other ear: 15" So now that I've got numbers, I should be ordering the armature soon. I've also got my materials for the claws, so maybe I can get those made next weekend. I also measured his eye mockup so I can finally start getting quotes on the thing. It's 2 9/16" on the long axis, 1 3/4" on the short, with the widest point of the short axis 1" from the round end of the eye. Going to be asking both Dreaming Tree and Candy Kitten for estimates. I hope that I can get him done before Memorial Day weekend (last weekend of May), so I can take him with me to Phoenix ComiCon. That may be a little optimistic, but we'll see! |
|
|
|
Post by poofiemus on Feb 8, 2014 22:11:09 GMT -5
Man, I've made some progress, but haven't updated most of it here! Gonna fix that now. So, first off, the armature situation. For a while I thought I'd just get extra of the interlocking armature stuff and put it in all of him so I wouldn't have to cut a bunch of sheet plastic. Then I did the math. To put the armature all the way through the spine, ears, legs, and wings, I'd need 15 feet. I wanted to use the 1/2" diameter stuff, but that came out to $73 without shipping! Looked at going down one size to 1/4", but that still came out to $43. :/ That made me re-evaluate whether giving him rubber hose/noodle articulation in his limbs in exchange for not cutting plastic was really what I wanted. In the end I decided I didn't want him to have noodle limbs, so I re-calculated things. The interlocking stuff is now going into spine and ears, plus a little ways out for shoulders and hips, leaving elbows, knees, wrists, and wing joints to be hinged plastic. This plan cut the armature amount required to 8 feet instead of 15, so I was able to get the 1/2" stuff. Then it was plastic time. Woo. /sarcasm 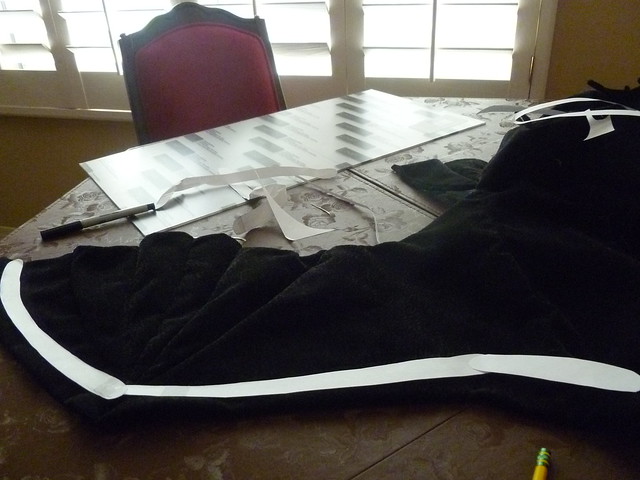 First I mocked up the pieces using printer paper. This let me figure out what size and shape I'd need for each part. I decided to make each end rounded so that there would be no risk of the plastic distorting the parts unrealistically when posed, or worse, corners tearing into seams. Then I measured the wing pieces, since they're the longest, and went down to Home Depot. 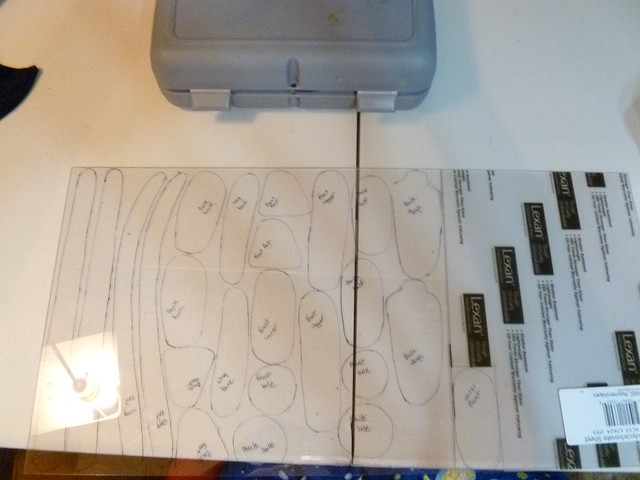 I ended up with a sheet of Lexan. I took the protective film off, and traced each template piece onto the Lexan with a Sharpie--two tracings for each piece. My original plan was to cut it with the Dremel, but it turns out Dremel cutting wheels and Lexan don't get along too well. 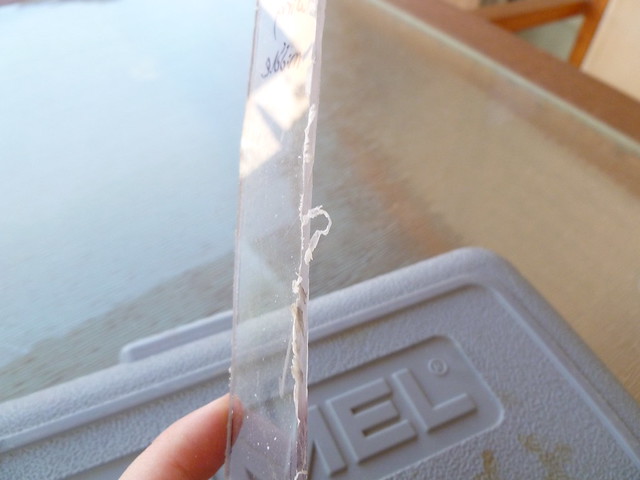 See that nasty, flakey burr on it? That's because, even on the slowest setting, the Dremel melted the Lexan. I could have done multiple shallow strokes to keep it from melting, but it would have taken forever. Also, the cutting wheel is meant for straight lines, not curves, so in order to get the right shapes I'd have to make multiple cuts tangential to the curves, which would also take ages. Yeah, definitely needed another plan. 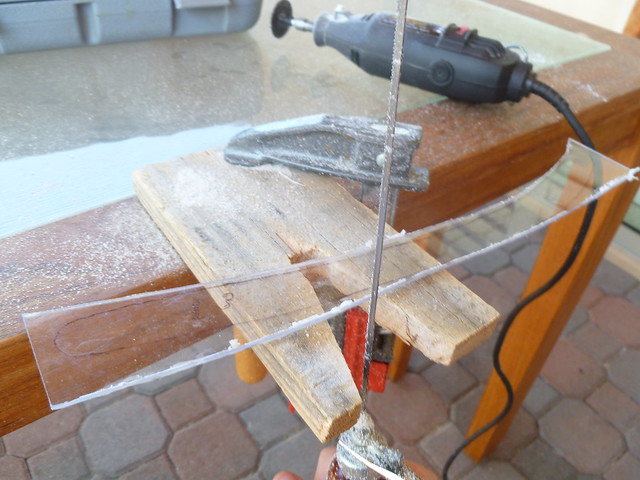 After talking to a few people at Ace Hardware about my dilemma, I took one of their suggested and partly fell back on the jewelry classes I took ages ago. I decided to use a coping saw to cut the pieces, which is a close cousin of the jewelry saws I've used for metal work in the past. The wooden thing you see is sometimes called a bench pin, and it's held to the table with a C clamp. You work inside the V, so that way more of your piece is supported while you saw. Great little doohicky if you do a lot of relatively fine sawing and/or filing. 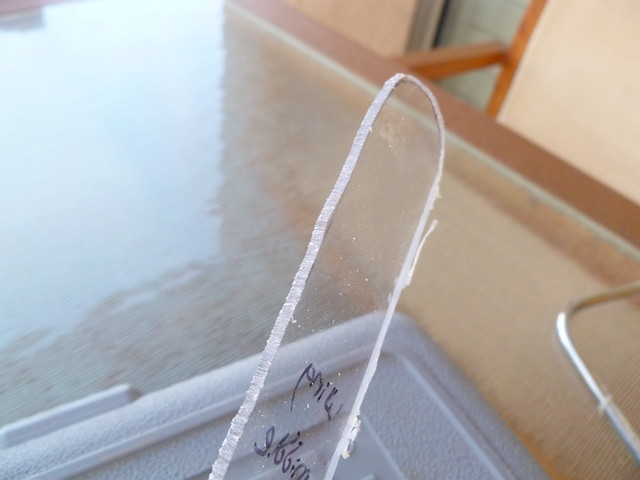 The cuts with the coping saw didn't turn out perfect, but it still works a lot better than the Dremel for actual cutting. However, just like a jewelry saw, the coping saw does best if you steer the piece you're cutting rather than the blade, so I still had to do rough cuts to get them down to maneuverable size before cutting them properly to shape. >.< I've finished all the rough cuts, but am still cutting them to shape. The Lexan wears down the saw blades really quickly, so it doesn't take long before it's a bit of a struggle to make a cut. It makes it a bit hard on my hands and shoulders, so I'm having to do it a little bit at a time. I realized the necessity of that the hard way; back in the summer I tried to marathon the rough cuts, and ended up cutting myself due to fatigue (and possibly overheating, it was well over 100 F at the time). I've learned my lesson, and am taking advantage of the nicer weather too. Then after that, I *have* found a way to put the Dremel to use. 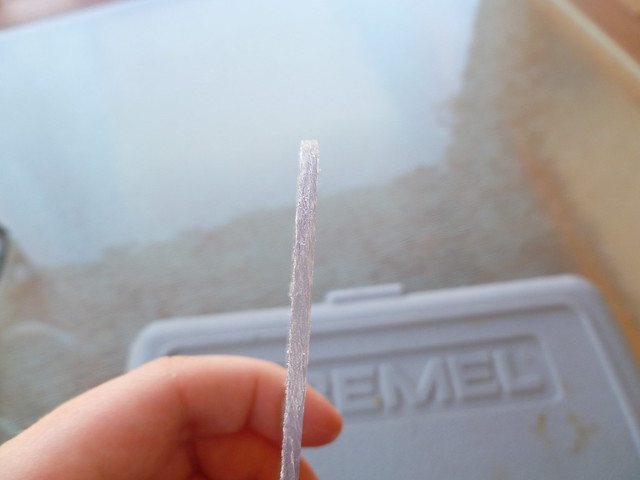 I can use the Dremel's sanding drums to even out the edges, and, more importantly, to bevel them. Yet another thing in my quest to keep this from snagging his outer fabric. As it stands right now: Rough Cuts: Done Shape Cuts: 10 pieces remaining Dremel Beveling: 9 pieces remaining Complete pieces: 5 I'm trying to focus on getting the shape cuts done, since those are the ones that hurt my hands. My intent is to do 4-6 pieces at a time. Once that's done, the beveling is time consuming but not really difficult in comparison. |
|
|
|
Post by poofiemus on Feb 8, 2014 22:40:49 GMT -5
I've also made progress on two other fronts: claws and eyes! The claws I made out of Kato, a type of polymer clay known for being relatively strong. It's a bit harder to work with than Sculpy or Fimo; Kato takes a LOT more kneading to get to a workable condition, and you won't get it to that point unless you add a bit of liquid Kato in. (Conversely, liquid Sculpy and liquid Fimo are more special-use, either as a way to get wet clay to adhere to baked clay or to modify the clay's texture for special effects like emulating cake frosting.) I made them into the expected curved cone shape, and then textured them a little with a small knitting needle. I also took a black safety eye and used it to make an imprint on the back. The plan is to glue the claws onto safety eyes, which will make sure they're anchored inside of his feet as well as outside. Polymer clays do shrink a bit when they're baked/cured, so it isn't a perfect fit anymore. Luckily I have a hemispherical Dremel bit that ought to do the trick. (Pictures to come once I figure out where on earth I put them.) I also made some progress on the eyes. I did originally find someone at Phoenix Comicon last year who tried to make eyes for me in dichroic glass, but apparently she had no luck making a teardrop or egg shaped form to base them on.  So I spent some time chewing over the idea, and decided to take a crack at them myself. Rather than make a mold to cast resin in, I'm making the irises and pupils out of polymer clay, and then will be coating them in multiple thin coats of clear resin to create the lens portion of the eye. This time, I do have pictures! 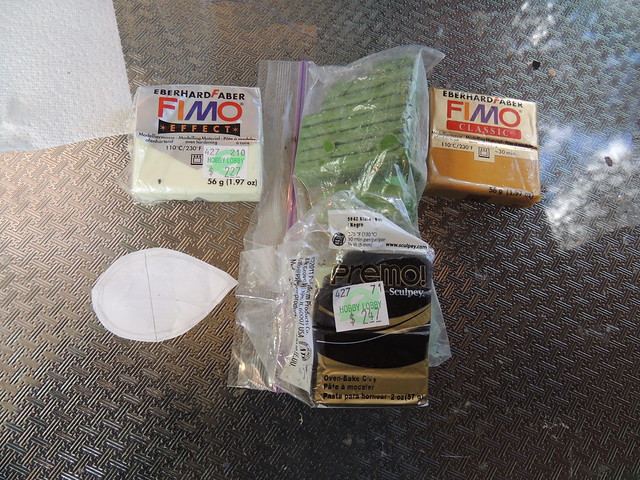 My supplies, sitting next to my eye template that I made eons ago. NOTE: Do NOT mix different polymer clay brands together for a custom color, especially not Sculpy/Premo with Fimo! The clays don't get along well and won't cure properly, so they'll disintigrate after a couple of years. The ONLY reason I feel safe mixing brands here is that the Premo pupils got baked separately from the Fimo irises. 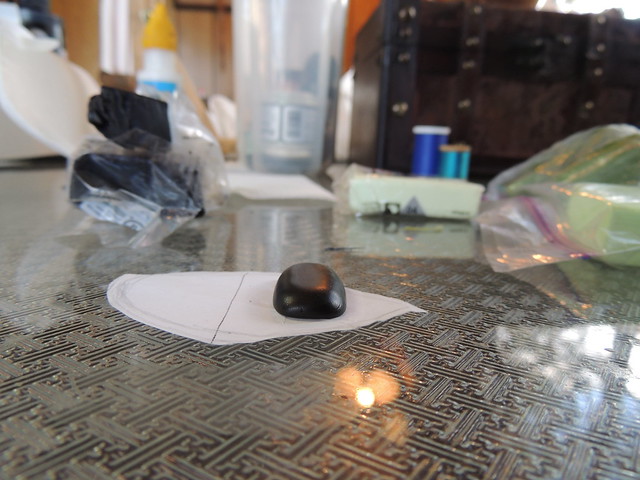 Speaking of pupils, I figure I'd better illustrate *why* I wanted to bake them separately. In addition to keeping them from getting squished while I work on the irises, I specifically wanted a 3-dimensional pupil. Might seem a little counterintuitive compared to real eye anatomy, but if you look at really high end BJD eyes like Enchanted Doll, Gumdrop, or Doll Bakery, you'll see the difference the 3D pupil makes in getting "tracking", that looking-at-you-even-as-you-move effect. I knew going in tracking on such big, flat eyes wasn't going to be great, so I want to do whatever I can to make up for that. I did bake the pupils, and then wet sanded them with 400, 600, and 1000 grit papers. I actually have a pack of sandpaper that goes all the way up to 12000; it seemed like overkill for the pupils, but I'll probably bust out those higher grits at the end of the clear-resin phase. 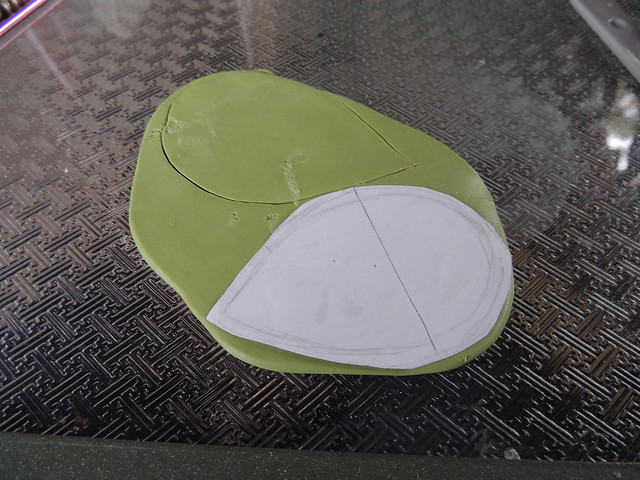 Then I mixed my Fimo irises (using glow-in-the-dark instead of white, but I expect the glow will be pretty subtle when this is all done), rolled out a sheet, and cut out my iris template with a scalpel. Then I brushed a layer of yellow-green Pearl Ex powder over each one--I want these eyes to be sparkly. Really sparkly. So this is just Phase 1 of Pearl Ex treatment. 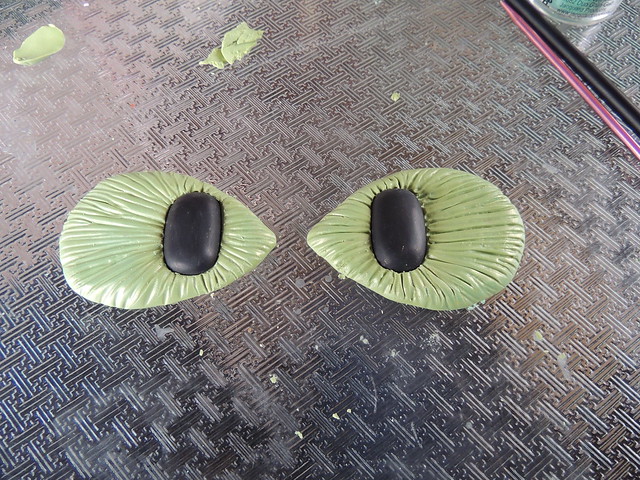 And this shows the other reason I wanted pre-baked pupils: I can now attack the irises with pointy things to give them texture. This is just phase 1 as well, done with a small knitting needle. I'll also be using dental tools and maybe a ball stylus as this goes on, along with liquid Fimo and more Pearl Ex in additional colors like gold and interference green. All that texture will look awesome when done, but it also means I'm sort of obligated to use the resin now; if I don't those grooves will accumulate dust like crazy and be a royal pain to clean. Smooth resin lens is definitely the way to go! I can only work on the eyes when I visit my mom, since she's the one with all the good sparkly stuff, so there'll be some gaps in their production. When the eyes are done and all resin'd, I'll be putting them on safety eyes as well. (Debating on if I should do two safety eyes per final dragon eye, or just one.) I might use suede leftover from his back and ankle ridges as eyelids, but not entirely sure yet. Might depend on how much magnification/refraction the resin gives them. |
|


 I mean, even if I do decide to make it, no caring what everyone says and all, the store that we went to is pretty far away...And I don't think my mom would want to take me to a far away store, JUST to buy fleece (or whatever the thing's called) and make a plush. She's probably do anything to change my mind